


ManicSlot's Track Scenery
Fryar Mountain Stage V
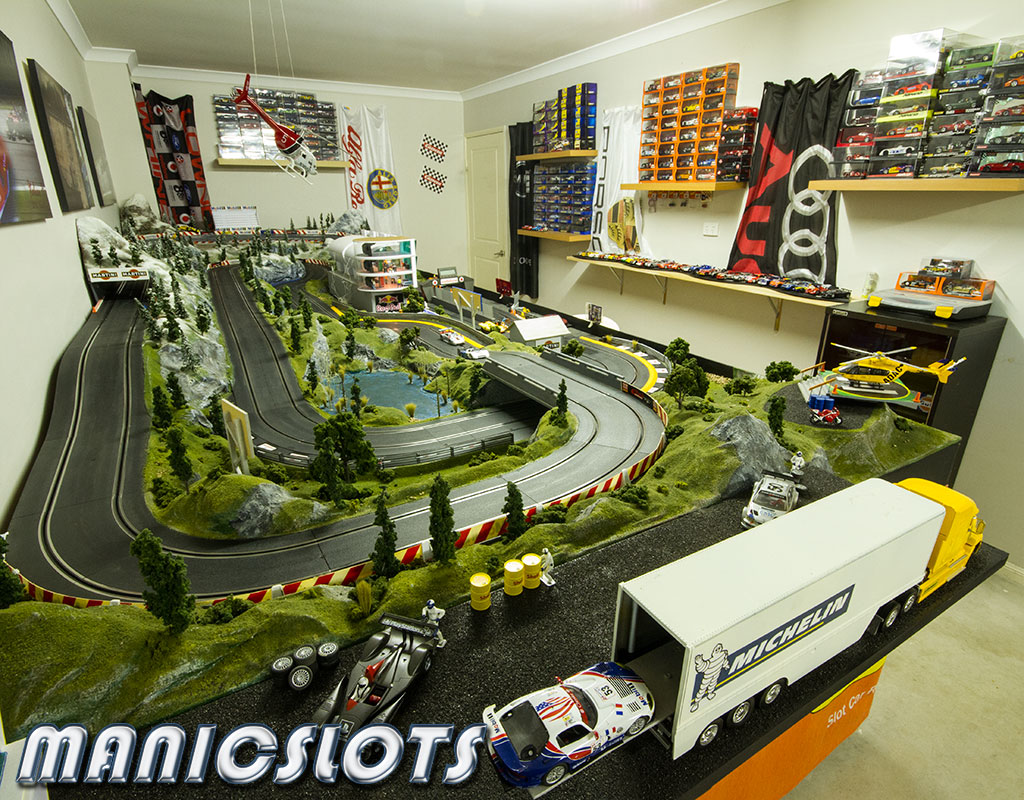
It's been a long time coming but I have finally photographed some of the improvements I've made to my home track, Fryar Mountain. My track is Carrera 1/24 plastic track which I've had now for close on a decade and I find to be excellent in terms of scale, resistance to rusting and excellent electrical connectivity.
The main changes made to the track are the addition of more trees (100 plus), the addition of a pit lane and the incorporation of a snow theme. The below photos give you an idea of the overall room set up, the sort of thing that can be achieved if you have an understanding wife. :)
The main changes made to the track are the addition of more trees (100 plus), the addition of a pit lane and the incorporation of a snow theme. The below photos give you an idea of the overall room set up, the sort of thing that can be achieved if you have an understanding wife. :)


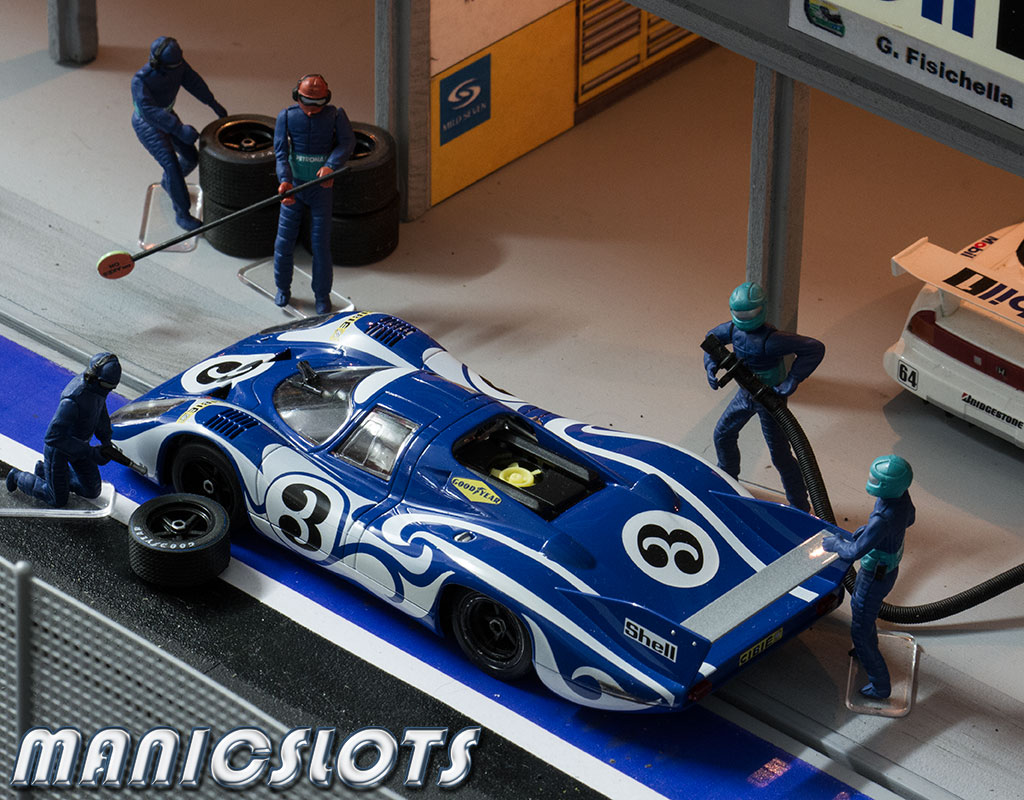
My pit lane mainly consists of Carrera buildings but the main '9 pit' section is made from 3mm MDF (particle board) and balsa for some fine structural detail. I drew up my design based on how much space I had and then cut the design out with a Jigsaw. I then painted the completed building with 2 different greys, (floor and walls).
I then added colour pit bay detail which was printed on paper (the Carrera4Fun.de website has the all templates you'll need - there is a link to the site on my Links page) and then cut out and pasted to the MDF using craft glue. I then sealed the paper detail with a thin layer of water-down craft glue. I find this stops fading and makes the paper more robust improving wear and tear, etc.


My son loves nothing more than turning off the lights and running his favourite Scalextric slot (with lights) around the track. I decided to experiment with some track lighting for my pit lane. The lights were sourced from ebay and are actually designed for doll houses but don't tell anyone. :) The system is pretty basic and easy to incorporate into your layout. The only real challenge is to ensure the wiring is hidden from view, the above lighting has been provided from 11 bulbs.
The lighting is effective in the immediate area but in terms of lighting your entire track you will need to incorporate dozens of lights to achieve the desired effect and to provide adequate points of reference for racing at night.
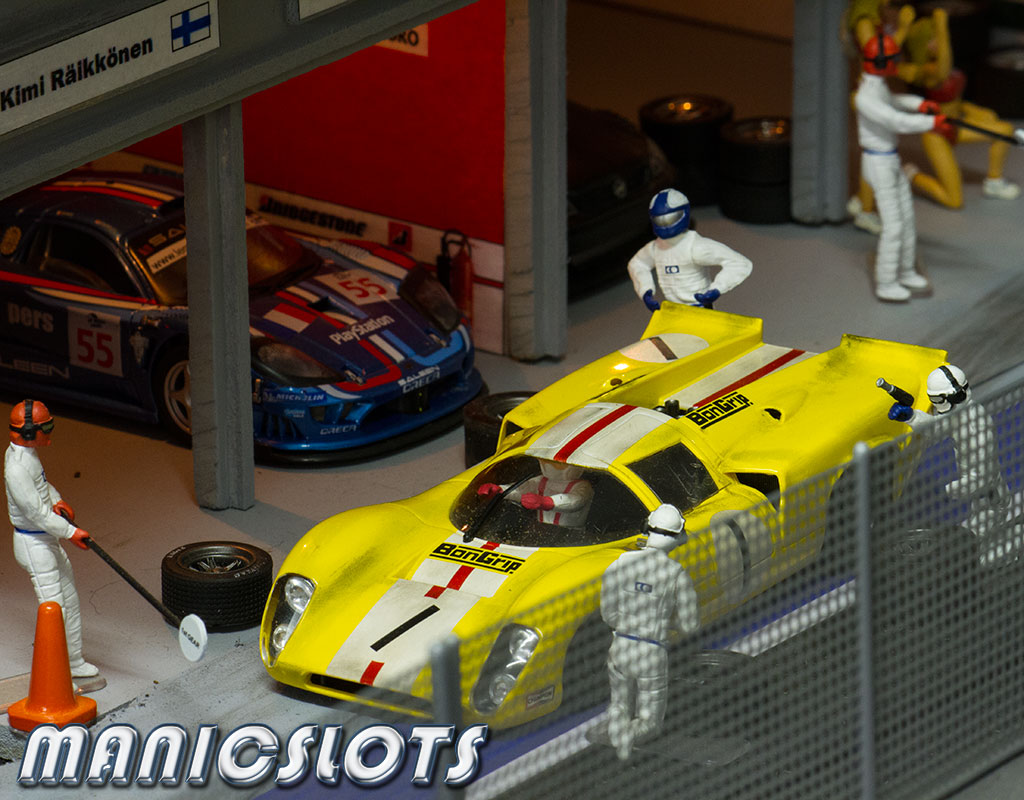


 Carrera building are great as a shell (starting point) but if you want your layout to look realistic, you'll need to add some detail. In the above photos you can see that I have added a tiled floor effect (again printed on paper - template from Carrera4Fun.de) and the painted the stair case and added some Carrera figures. I also added some furniture like desks, computers, (bit of a race control) vending machines and even an old Fly GT40 I had as an exhibit. As always, the more detail you can add the better, I intend to add more people (at least double) to my pit lane in the future for example.
I then added colour pit bay detail which was printed on paper (the Carrera4Fun.de website has the all templates you'll need - there is a link to the site on my Links page) and then cut out and pasted to the MDF using craft glue. I then sealed the paper detail with a thin layer of water-down craft glue. I find this stops fading and makes the paper more robust improving wear and tear, etc.
My son loves nothing more than turning off the lights and running his favourite Scalextric slot (with lights) around the track. I decided to experiment with some track lighting for my pit lane. The lights were sourced from ebay and are actually designed for doll houses but don't tell anyone. :) The system is pretty basic and easy to incorporate into your layout. The only real challenge is to ensure the wiring is hidden from view, the above lighting has been provided from 11 bulbs.
The lighting is effective in the immediate area but in terms of lighting your entire track you will need to incorporate dozens of lights to achieve the desired effect and to provide adequate points of reference for racing at night.
Carrera building are great as a shell (starting point) but if you want your layout to look realistic, you'll need to add some detail. In the above photos you can see that I have added a tiled floor effect (again printed on paper - template from Carrera4Fun.de) and the painted the stair case and added some Carrera figures. I also added some furniture like desks, computers, (bit of a race control) vending machines and even an old Fly GT40 I had as an exhibit. As always, the more detail you can add the better, I intend to add more people (at least double) to my pit lane in the future for example.
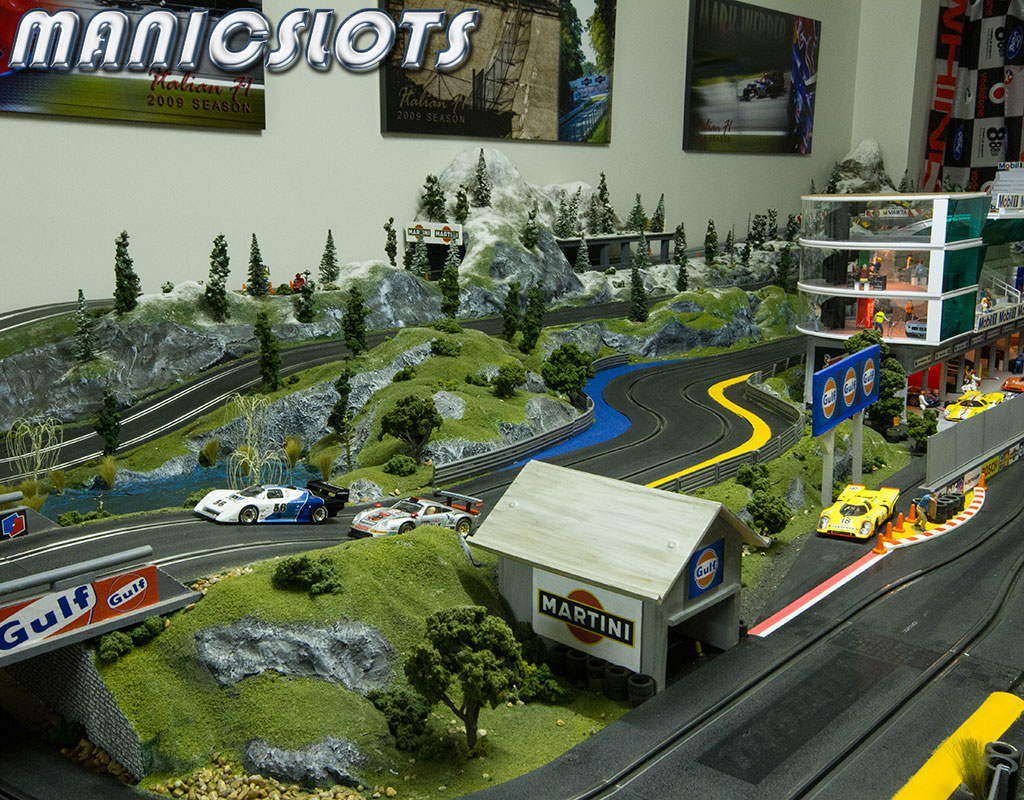
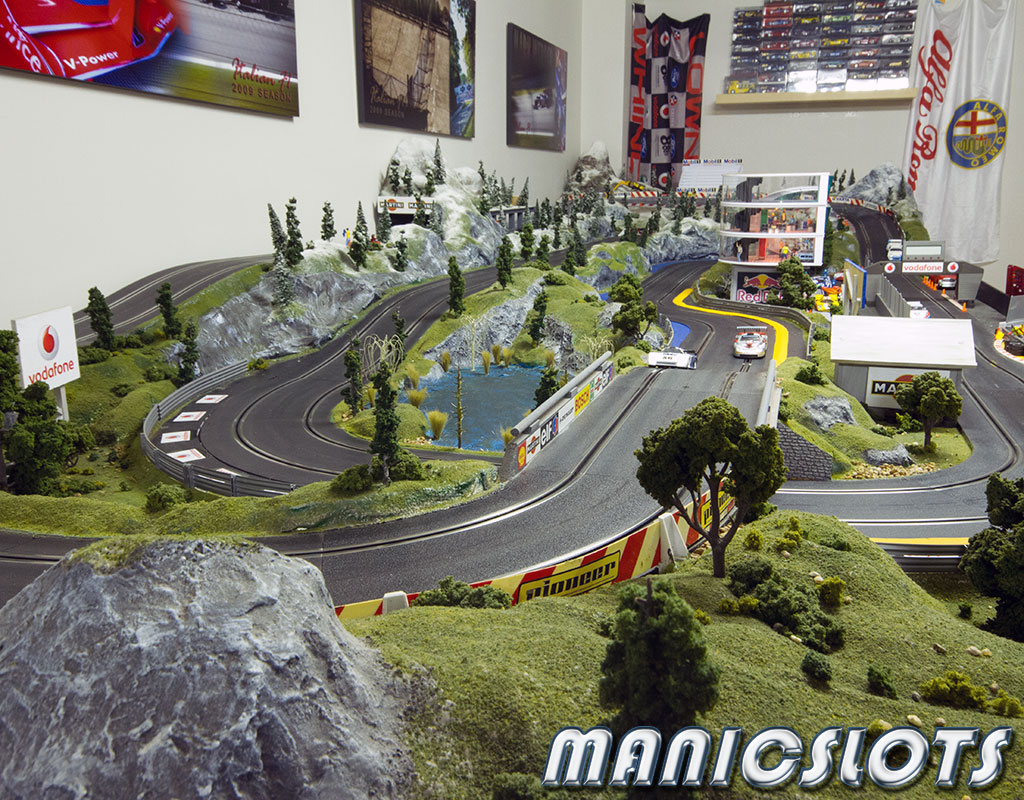
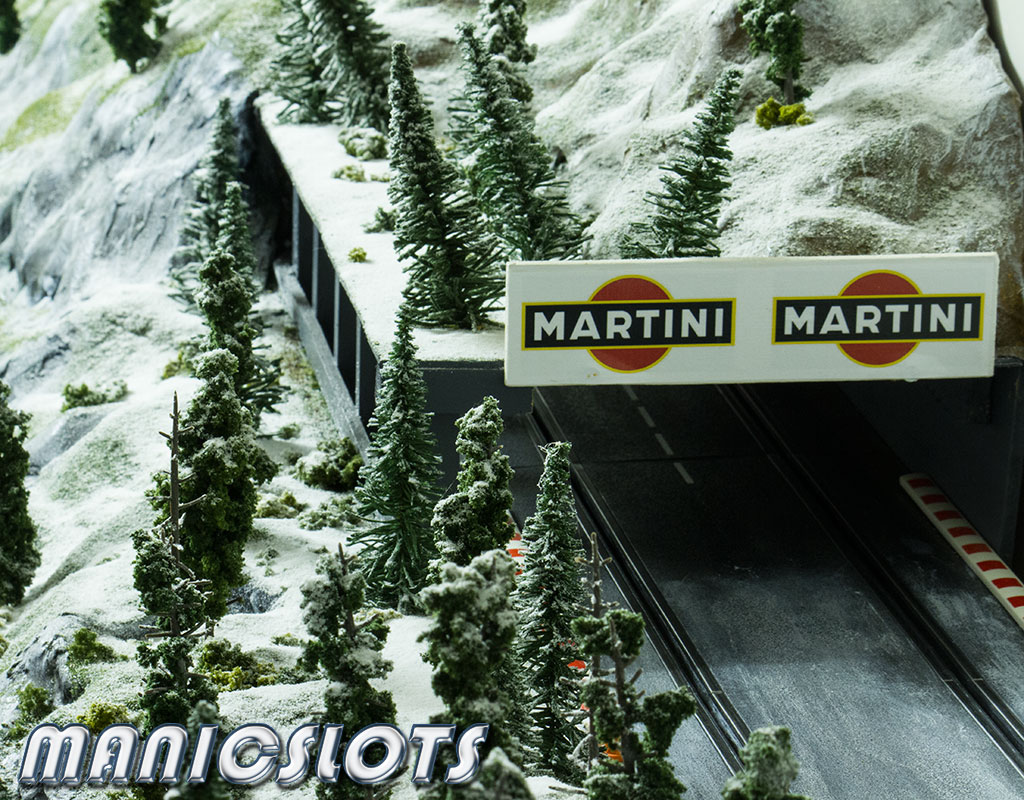
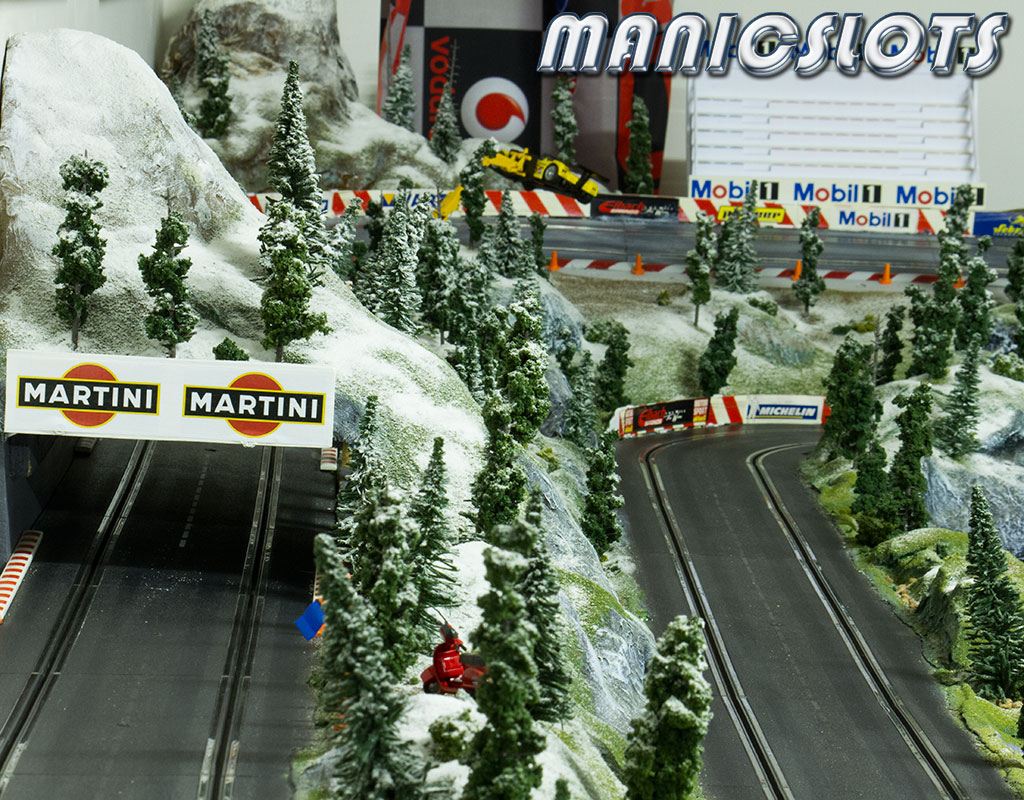
I have wanted to add a bit of a winter Alps feel to my track for a while but had to wait till all the trees and scenery elements had been added. I used woodland scenic's snow powder (one large container was enough to cover what you see here) to create the snow look. As the product is VERY light weight (like talc powder almost) it was important to glue the powder to all surfaces - otherwise a small breeze would dislodge the powder. As always I used a watered down craft glue (watered down enough to use in a spray gun) and coated all surfaces (including trees) with a good application of glue before sprinkling the snow powder on.
It 's an easy product to work with and the more you apply the more concentrated the snow 'effect' looks so you can create variations in intensity. For example, the tops of my mountains have a thick application of the powder but the lower areas do not. To add a more realistic appearance, the track has been painted lightly with a white paint as well.
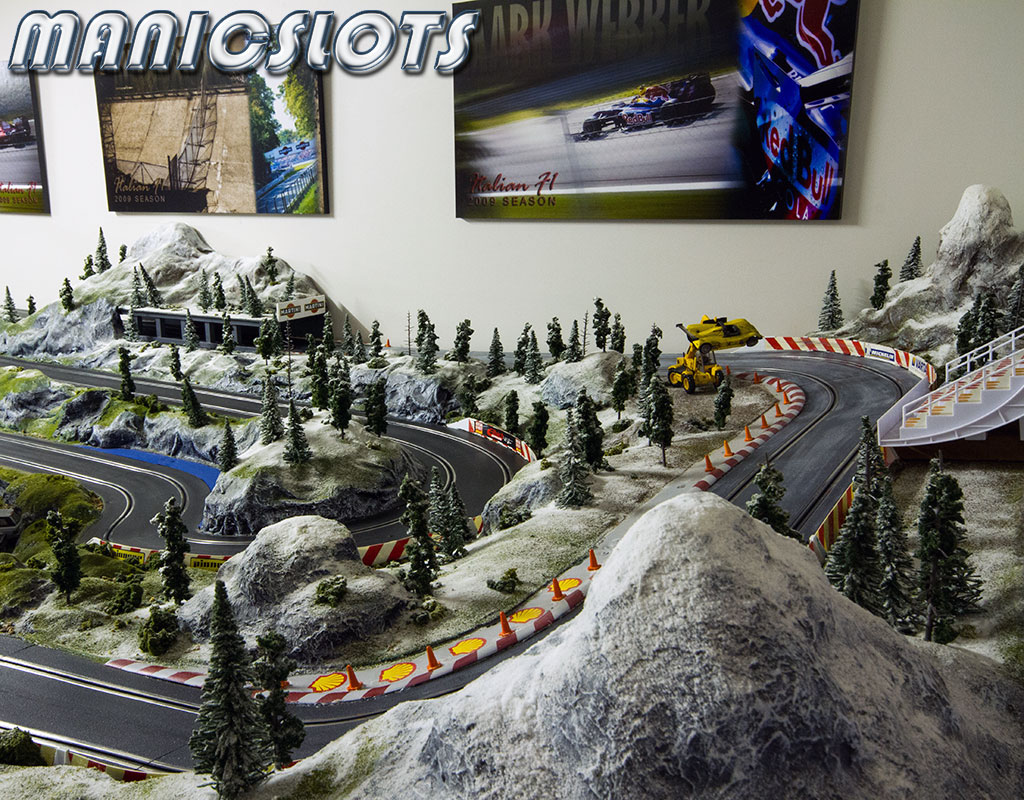


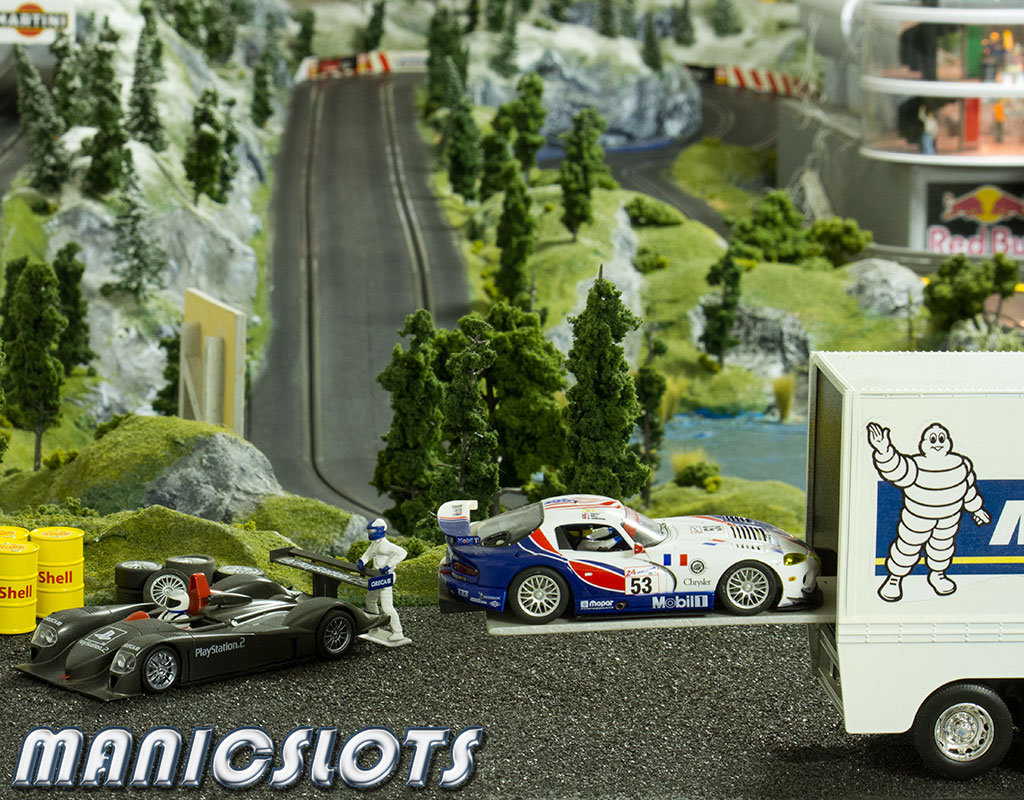
I'm going to do a little 'how-to' article on the construction of the mountain/tunnel feature on my track so I won't go into too much detail now. The tunnel is again made from MDF and balsa wood (love the stuff) with the addition of plaster sheeting to create the mountain landscape component. When building something like this be sure to take into account height and width for all potential future slots, (i.e. Fly trucks, etc.) and you also want to think about hand access. Without doubt slots will come off inside your tunnel (or under your bridge) and you'll need to be able to recover them quickly, so don't make it too long or too big.
The below building is again made from a combination of 3mm MDF and balsa wood for structural detail. The purpose of the building was to hide an ugly switch box which controls the flow direction of each lane on my track. The roof will be improved in the future with corrugated model sheeting but for now a simple two tone painted grey is effective enough. Add a little bit of sponsorship detail (again printed on paper and clear coated with craft glue) to your building, a few old slot tires and it becomes a great feature for your track.

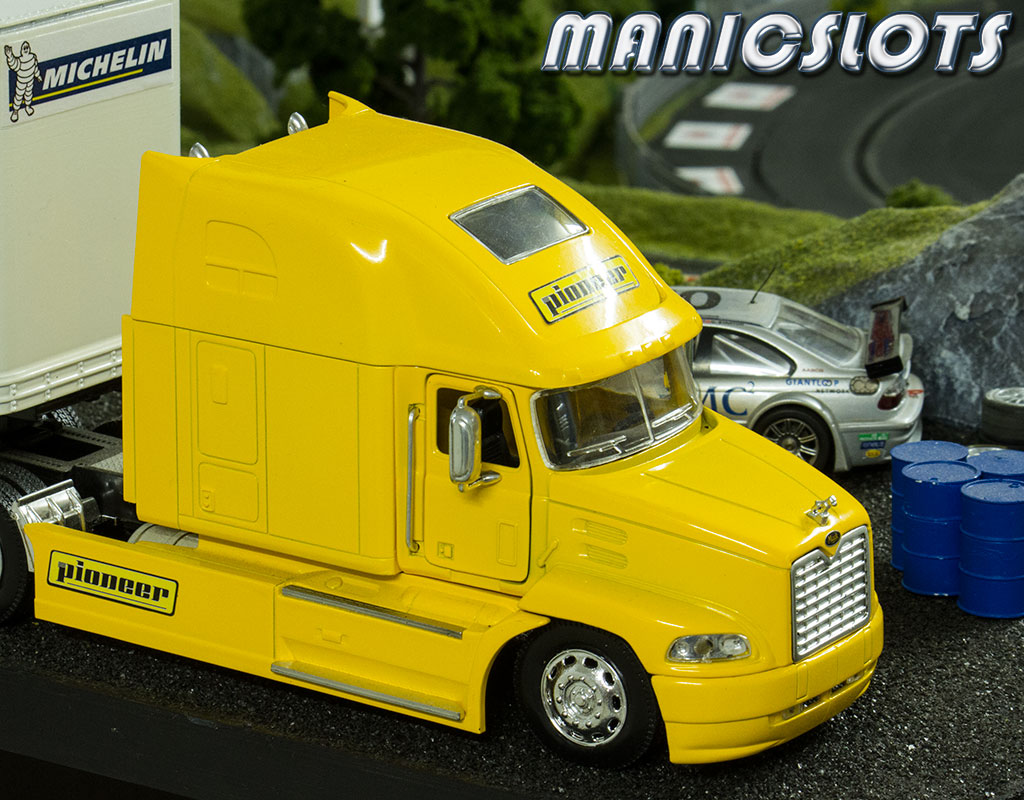

The below helicopter (which isn't quite 1:32 scale) adds an extra element when combined with a few Carrera figures, a 1:32 bike, cones and some drums. The MDF landing pad was drawn up in photoshop and glued to the surface.

Find this useful? You'll find more useful 'How-to' content, tips and tricks at the below link.


────────────────────────────────


3 comments :
Fantastic track layout, love all scenery you have done and i have to say a great collection of cars as well.
Great work! Must be really cool turning some laps on that track. I'm sure my eye wouldn't be on the lap timer here, it would be all over the place with this scenery. :)
Amazing work and photography! Just starting in this hobby and you are a great inspiration, thank you.
Post a Comment