


How-To: Creating Professional Slot Car Scenery
So you're lucky enough to have the space for a permanent slot car track setup but it's missing something, somehow it doesn't look right. Well that something is most likely realistic looking scenery for your track layout. This 'how-to' is an introduction to the products and techniques you can use to create your own version of Bathurst, Le Mans or Monaco right in your own home.
Firstly a word of warning, this is not a task for the faint hearted and you wont finish in one afternoon. My track is 10 square meters in size and I'm estimating it will take 6 to 9 months and cost $1500 to complete. If that doesn't scare you off, then continue reading and you'll soon be on your way to a professionally landscaped track layout in no time.

There are many elements to the slot car hobby and track scenery is just another one.
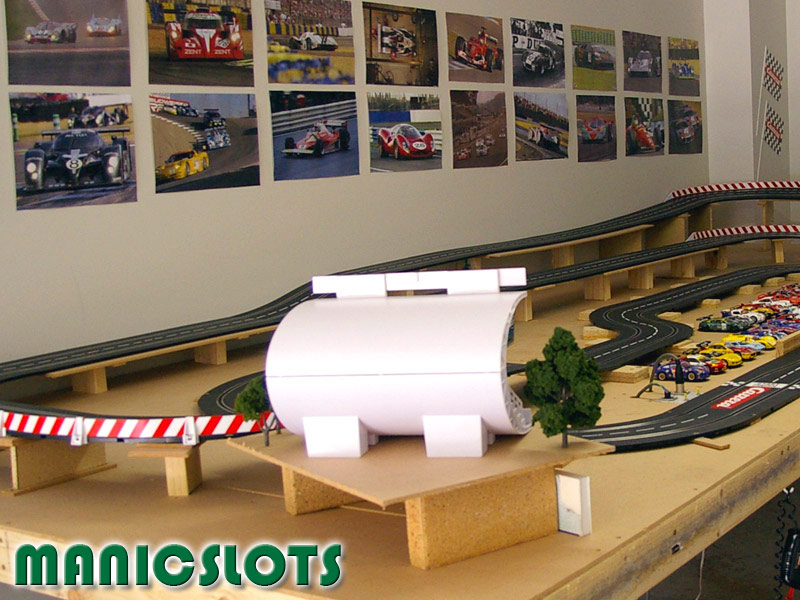
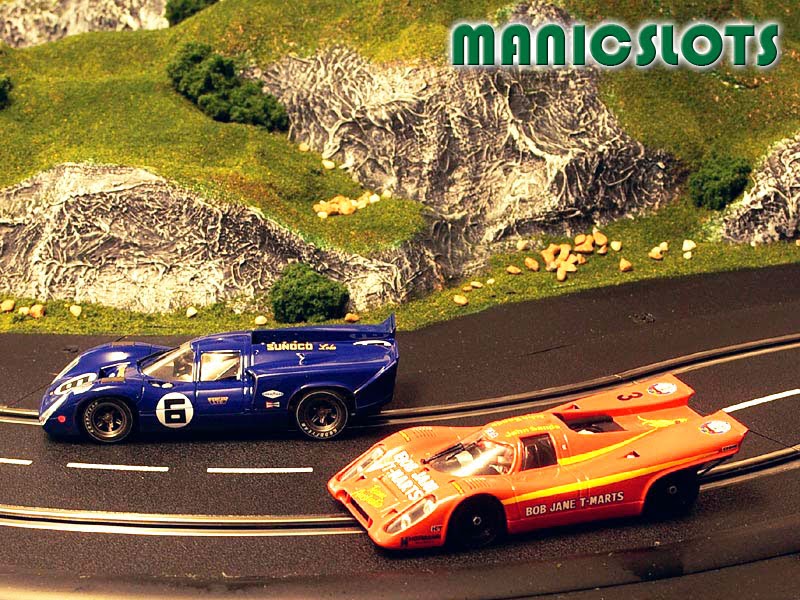
If you've ever driven a slot car around a professionally landscaped slot car track you will know how good scenery adds to the enjoyment of our great hobby. One look at the above photo will confirm just how important scenery is. I designed my track layout over several weeks and then played around with the relief of the track for several more.
I needed to have a fair understanding of how the topology was going to look by this stage. Once I was happy, I then spent several weeks constructing 'I' sections from wood to adequately support my design. The unfortunate part of this was that while the track was great to drive, (there is nothing like vertical variation in a slot car track) it looked like a super highway minus the grey paint - horrible! What I desperately needed was to construct some good scenery.
Step 1 - Track Scenery Theme
The first thing you need to do can be one of the hardest steps or the easiest - you need to decide on a theme for your track. Summer, autumn, winter, spring, European Black Forest, Sahara arid desert, open-planned F1 style circuit, alpine snow covered or tropical lush green...maybe you can find inspiration from your favourite real-world track? When it comes to landscape the choices are endless and only limited to your imagination. I always bounce scenery concept of slot buddies, they will quickly tell you if your idea is on the nose!
The next thing you need to decide is what major scenery items will you incorporate into your design. Will you have a bridge, tunnel, grandstand, pedestrian over passes, river, lake, pit lane buildings, helicopter landing pad, race team area, forest, cliffs, hills or mountains.
You will also have to incorporate any equipment such as timing bridges, monitors, controllers, etc. It's a good idea to 'live' with your design for a while if you can. For example, I wanted to incorporate the above grandstand into my layout, so I set it where I thought it would look good for height, orientation and location. I then left it in position for a few weeks to see if I liked it or if there was a better position?
It's very important to get things mapped out 95% right during step 1, draw some rough layout plans of your design on paper and make sure it works. Plan, plan and then replan, getting it right at the start can save some major pain and cost down the road!
You can always use one of the many free track planning software tools to help you plan your layout. For helping with the design of my track I used Ultimate Racer 3.0 as it supports Carrera track (amongst others).
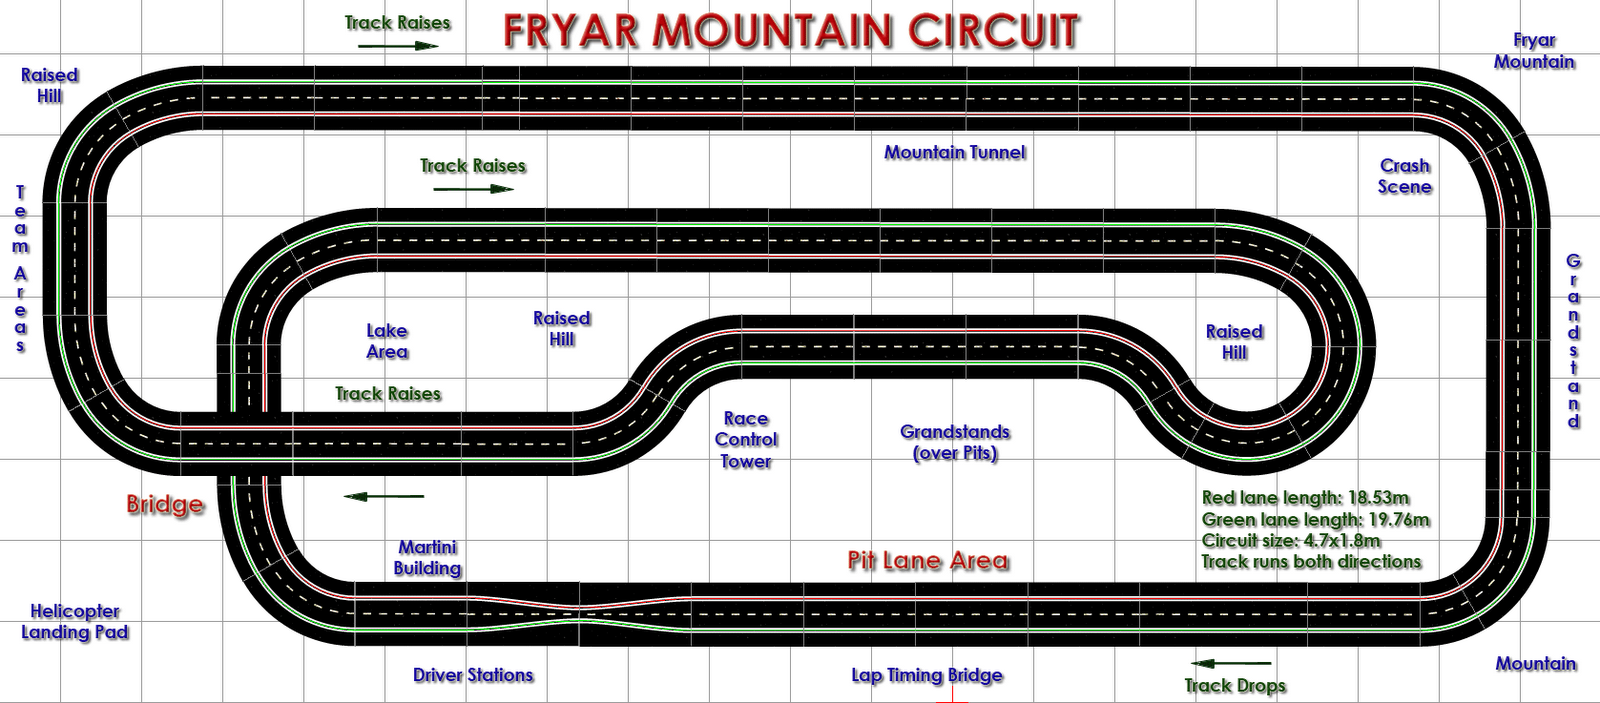
Above is an image generated from UR3 to give you an idea of what you're able to achieve, (text added using Photoshop although UR3 supports text). You can find a link to the software from our 'Links' page by clicking the below button.

Step 2 - Creating The Elevation
This step is what I term 'filling in the gaps'. I wish there was a quick way to do this stage but if your layout is large and track elevated, then its going to take you some significant time. You need to build your scenery up to approximately the height of your track, unless your creating cliffs each side of your track. There are numerous ways to do this and it doesn't really matter which way you do it as long as you have a stable platform for your scenery.
One of the quickest ways can be to use MDF, (or similar material) to build up your track - like creating a false floor. This can be particular useful if you have highly elevated sections and want to be able to store items between the completed scenery level and the top of the track table. I created several storage holes, (right-hand side of the below photo) in my highly elevated areas that are assessable from holes in the sides of my table. I use these areas for storing slot toolboxes, bits and pieces and slots I actually don't own! ;)
Another quick method is use aluminum fly screen. Cut fly screen to the approximately size of the area you need to fill. Then using a staple gun, staple the fly screen to the edges of your track. You can see in the below photo what the fly screen looks like in position.
You don't need to cover 100 percent of the area just the majority of it, (note the gaps next to the track in the left of the below photo). Depending on the size of the area you are covering you may need to support it from underneath. My span was too large so I supported the fly screen with some foam blocks which could be removed after plastering or left to provide support.

Next, cover the area using plaster cloth, cut the cloth into small sections no greater that a foot long as it gets hard to manage. Be sure to overlap each piece of cloth as this gives the surface strength. At first I used a plaster cloth product by Woodland Scenics and although this product is excellent it is expensive if you have to cover large areas. If you are doing a small area then you can find this product at your local hobby store or online.
As an alternative you can buy plaster of paris in powder form, (Uni-Pro produce it, available in most hardwares) and using chux cloths you can achieve the same outcome. This method is MUCH cheaper although it will be a messier and you will have to work quickly or do small batches of plaster.


As an alternative you can buy plaster of paris in powder form, (Uni-Pro produce it, available in most hardwares) and using chux cloths you can achieve the same outcome. This method is MUCH cheaper although it will be a messier and you will have to work quickly or do small batches of plaster.
The fly screen method is used primarily to create a surface between your various track sections. One problem with the fly screen method is that you won't achieve much detailed shape from your landscape features. To add extra detail, for example small hills, ridges or rocks I use newspaper rolled into small balls and taped into position.
I have shaped polystyrene foam in the past for small projects and had a lot of success with it. However, for a larger job it is too time consuming so I use the newspaper/plaster cloth method. If you do decide to try some polystyrene foam, glue the roughly cut pieces into place using a PVA glue and them use a flame, (BBQ lighter is perfect) to melt the foam creating texture. Please do this in a well ventilated area, preferably outdoors.
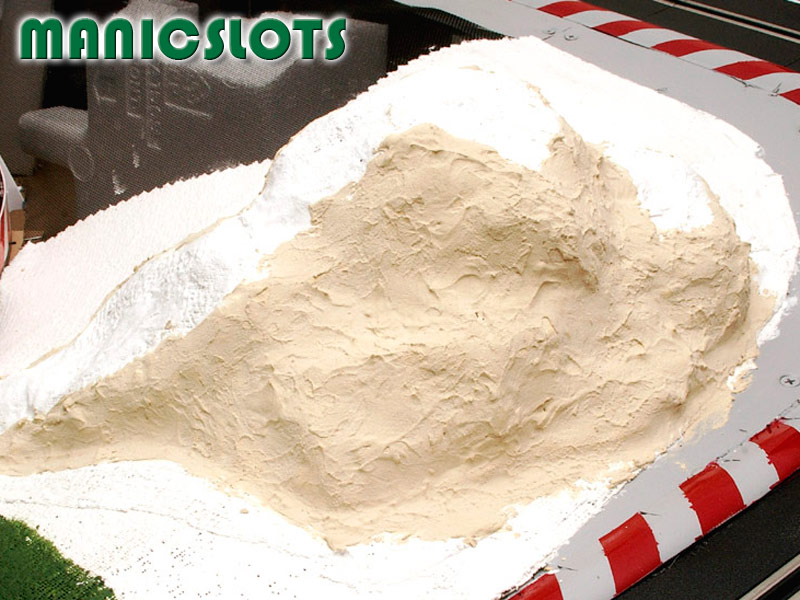
In the below photo you can see how I've used newspaper to create small mounds along the side of the track. Once you are happy with your shape you can cover the newspaper with plaster cloth creating instant hills. The cloth dries in around 1 hour but has full strength after 24 hours. If you get any excess plaster on your track just use a damp cloth to wash it off.
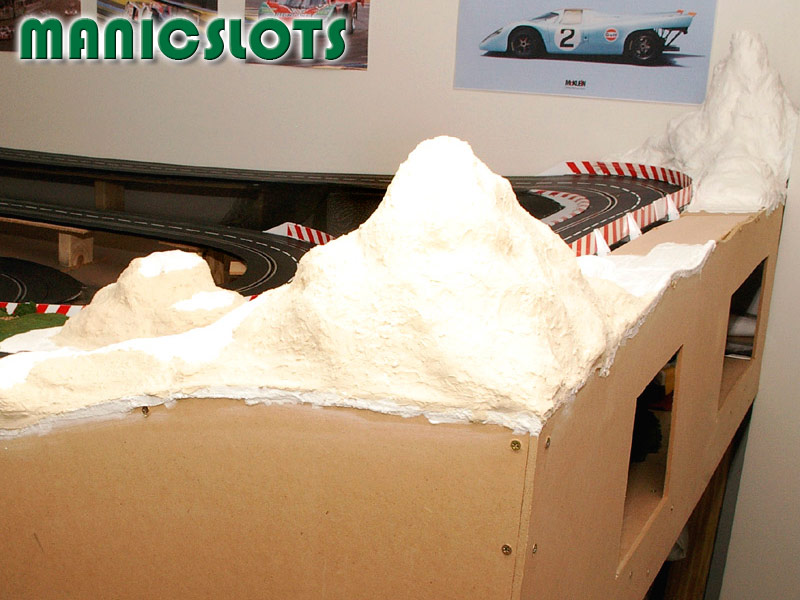
In the below photo you can see how I've created a small hill onto of the aluminium fly screen and then finished with plaster cloth. You will also notice in the below photo that there is a darker, (beige colour) large section on the side of the small plaster cloth hill.
I decided to make this section of the hill a rock face and have covered it in putty. You could paint the plaster cloth but as the texture is quite smooth the result will not be very realistic. I use a coarse putty, (something for outdoor hardwoods is fine) and apply it roughly, you don't want a smooth surface here. Get a pair of disposable gloves and use a finger to lightly tap the wet putty creating raised featured.
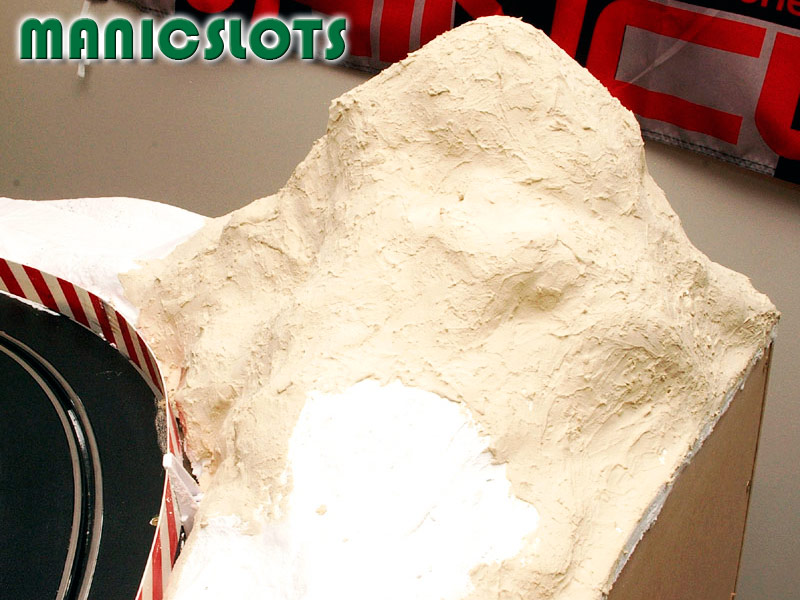
Here is another example of a larger hill mostly covered with putty to add texture. This hill is just mounded newspaper covered in plaster cloth and covered with putty.
Step 3 - Painting
Once you have completed a section of your terrain it's time to apply some paint as a base layer. I use water colours which you can buy for a few dollars a tube from any hardware or craft store. You can water them down to make them easier to spread but don't water the colours down too much or you'll have to apply additional coats.
As my track theme was ever green, my base coat was a dark green coat. I then followed this with some mid brown and finally some white to add texture and highlight. If you haven't painted before don't worry, this is 1st grade painting so have some fun. Highlight some areas with more brown that would be naturally less grassy, ie step areas, muddy areas or areas you might place some small rocks later.
Areas that you have covered in putty will get a different colour treatment. Decide what colour rock faces you want, (black, dark brown, dark blue) your track to have and start with this colour as your base coat for these areas. These water colours dry very quickly, (around the hour) so you can apply a second base coat if required pretty quickly. Once the rock areas are completely dry it's time to see how good you were at making rocks.
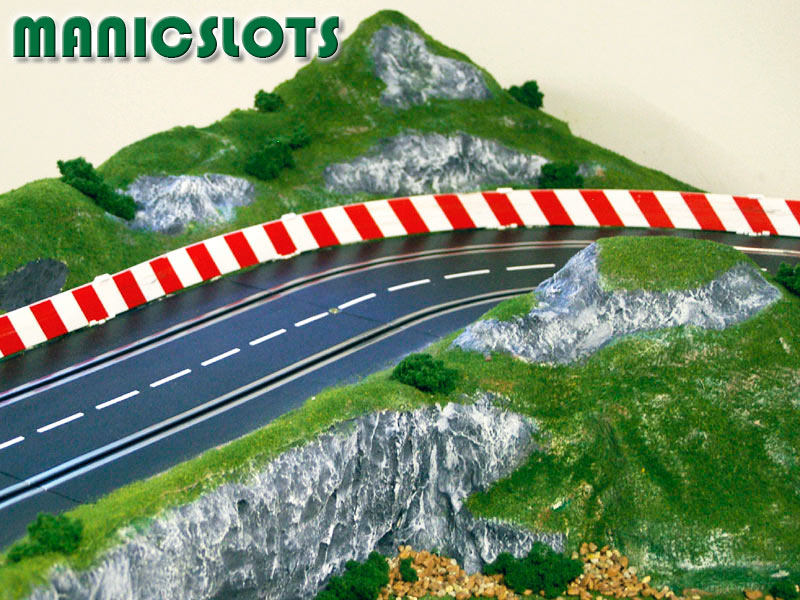
Get a medium sized painters brush and dip it in some white paint. Using newspaper, wipe as much of the white paint off the brush as possible. You should basically have NO paint on your brush and if you were to paint your hand there would be no paint on it. Now take this paint less brush and brush the raised texture of the putty. You'll notice that there is actually some paint on the brush and that white paint is highlighting the putty texture creating the appearance of weathered rocks. This painting technique is termed 'dry brushing'. Have a look at the rock areas in the below photo.
The below photo shows some more areas that have been dry brushed to create a weathered rock appearance. The rock cliff in the bottom left-hand side of the photo was done with polystyrene foam.
Step 4 - Adding the Detail
Now that all the painting is finished you can add some detail like small rocks, grass, logs, bushes, rocks, etc. I also use Woodland Scenics products for this stage of the process, I have tried some cheaper products but the results have been less than favorable so I recommend not cutting corners during this final stage.
Woodland Scenics produce a huge range of different products so you have numerous texture and colour options here and they are available from most hobby stores. They are specifically designed to be used for model railway scenery but grass is grass. You can get fine turf, coarse turf, blended turf, clump-foliage, foliage clusters, etc., etc. in heaps of different colours.
I like to use at least 2 different colours of grass, (light colour grass on top to highlight) to do my grass areas. You can buy special Woodland Scenic shakers but I just use an old Parmesan cheese shaker. Firstly coat the area you are going to apply the grass to with a light coat of watered down PVA glue.
Once again Woodland Scenics make a product, (PVA based) you can spray onto areas instead of painting which is very handy but it's expensive so I paint during this phase. Once your area is adequately painted with PVA glue, sprinkle the grass lightly onto the area, don't use too much till you get the hang of it. If your applying a lighter grass for highlights, apply it once you have finished with you primary darker grass.
You can also get all kinds of sands and gravels so you can apply all of these different finishes at this stage. If you have any little rocks, (fish bowl rocks are good) you can apply them now in areas that you would naturally find rocks. Remember you are trying to create a realistic looking world so don't place rocks in funny places.
At this stage I also add some small bushes to add realism. I like to use a darker colour than the colours I have used for my grass so that the bushes stand out. The best thing I have found for bushes is Woodland Scenics clump-foliage, you get quite a large bag for $AU15 and you simply rip it into the size pieces you want.
Once you've placed all your grass, rocks, twigs, bushes, etc. it's time to seal it. Firstly use a clean brush to remove any grass from your putty rock areas and track. Using the spray PVA based adhesive I talked above previously, spray a fine mist of glue over all treated areas. This will act as a sealer and ensure you don't end up with grass all over your track and therefore onto your slot braids. If you get some over spray onto your track remove it straight away, (warm water) particularly on the rails.
Step 5 - Adding the Goodies
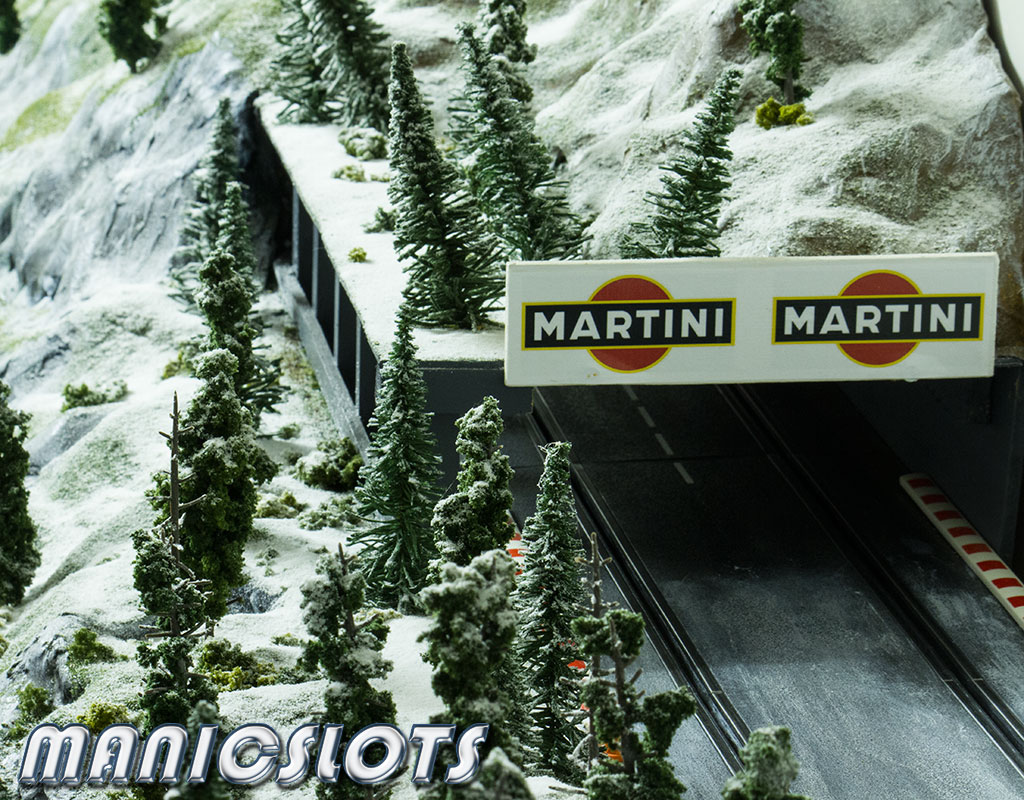
The last step is to add the little details that make all the difference. It's always difficult to source 1/32 scale static scenery items but you will find them in toy stores and hobby shops. Add a few of these items will really get your track looking fantastic.
In the above photo I purchased a 1/32 lifter for $AU9 from a toy farm range and converted it into a track-side crashed car remover. I trashed the remains of an old Fly B98 and bingo, great piece of slot car scenery.
You are only limited by your imagination when it comes to adding detail to your new layout and the more you add, the better and more realistic your track will look. Checkout some of the follow-up scenery tips and tricks pages I've linked to at the bottom of this article; signage, helicopters, team transporters, pit lane buildings and even construction sites!
You are only limited by your imagination when it comes to adding detail to your new layout and the more you add, the better and more realistic your track will look. Checkout some of the follow-up scenery tips and tricks pages I've linked to at the bottom of this article; signage, helicopters, team transporters, pit lane buildings and even construction sites!
Step 6 - Adding Trees
One of the most effective scenery items you can add to your layout are trees. The main problem you're going to have is getting enough of them to make your layout look realistic. Even on a small layout, (several square metres) you're going to need dozens of trees to get a decent effect. Remember, the more realistic your track looks, the more fun it will be to race on.
You can purchase readymade trees from a number of companies (Faller, Woodland Scenics, JTT, etc.) but the realistic looking trees can be very expensive when you are looking at purchasing dozens or even up hundreds if your layout is as large as mine.
Let's face it, you'd rather be spending your hard earned dollars on new slot cars so you need a price effective way of producing mass trees. This is where making your own trees can save you serious dollars.
There are numerous ways of making model trees and some are better (or more realistic) than others. I like to make my tress and life-like as possible so I'm prepared to spend a little more to that end. As I describe this simple method for making your own trees, I'll also talk about some of the materials you can substitute to reduce the cost of the process even further.
The process of making your own trees is a little too detailed to cover here so I have created a seperate How-To article, you can find it below:
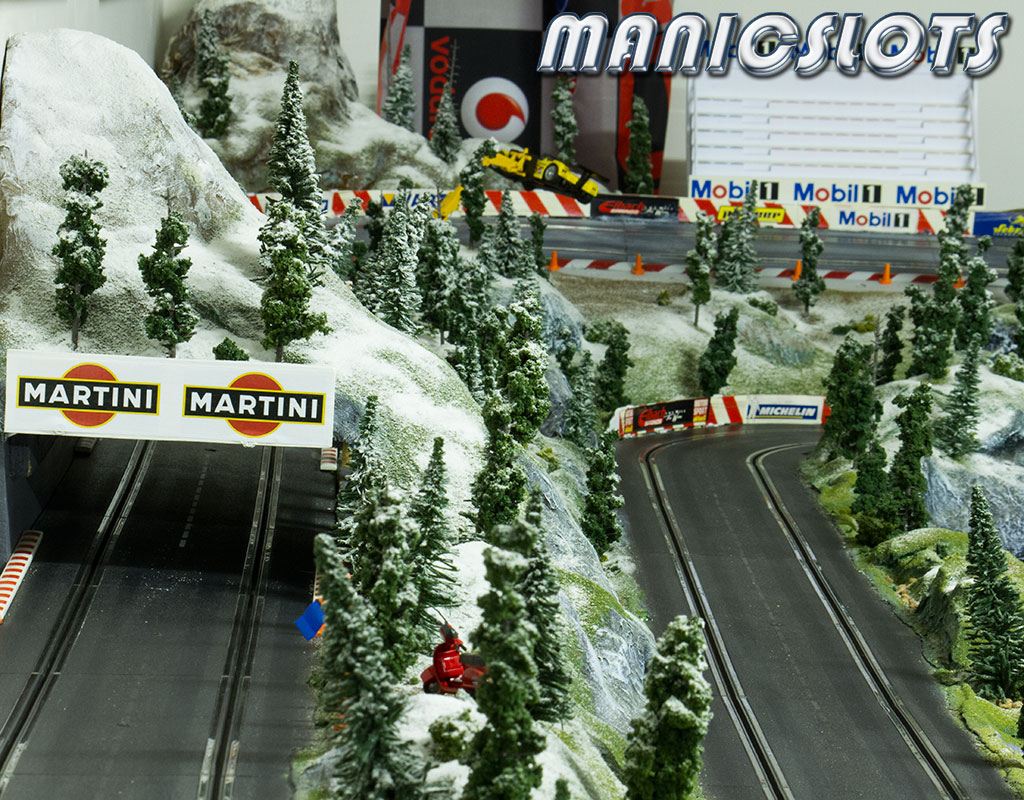
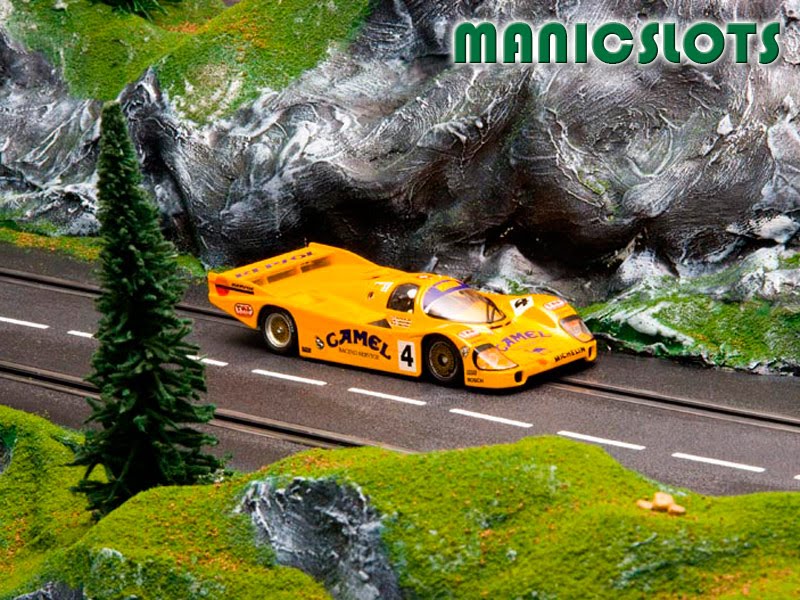
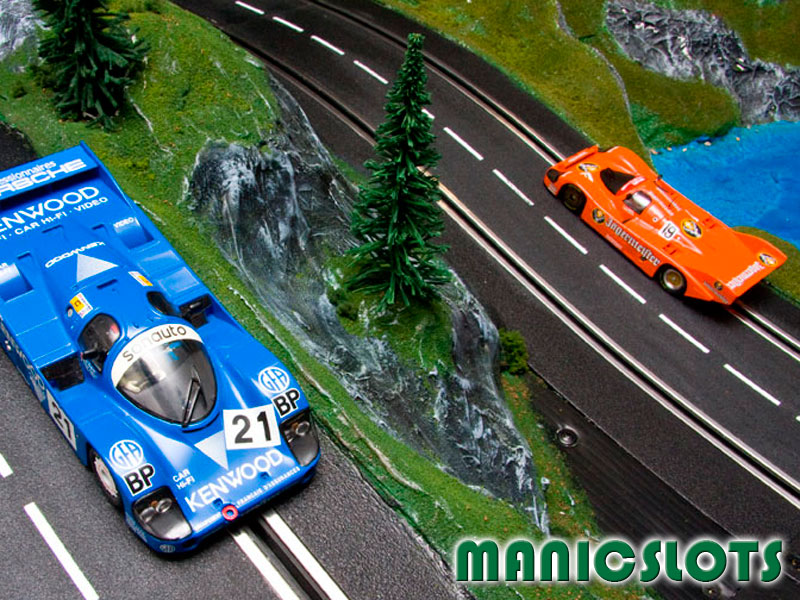
I've added a few photos of my track layout below to give you some ideas of just some of the things you can do with scenery. Good luck, enjoy yourself and don't be afraid to experiment as you can always paint or construct something again.


You can find some more scenery tips and photos at the following resources:


Find this useful? You'll find more useful 'How-to' content, tips and tricks at the below link.


────────────────────────────────


13 comments :
Hello,
I have read this item on your log with great attention and joy ! You have built a really nice track !
Best regards, BK
Nice looking scenery! Thanks for posting this primer.
Kalmbach publishing, who produce Model Railroader, among other hobby magazines, has a slew of model railroad scenery how-to books. They're worth looking into.
hey nice tip, i really love those cars, very cool....keep it up...
1967 Chevrolet Shop Manuals
Nice, Terrific, Beautiful!
Thanks for share the images.
You have made a sensational work!
It must be great running on it !!!
Congratulations.
Artur Oliveira
Lisboa - Portugal
wow its amazing, how do you create a lot of scenery without using loads of special scenery techniques but still make it look realistic?
Thanx
Looks magic, this is my dream to build a track like yours. If only I had the space to do it.
What a nice job you've done here!
It looks fantastic , and also verry usefull for beginers like me!
Thank you for posting
Best regards,
Aimilios
Thanks for the tips. Makes scenery construction less daunting.
Cheers
Paul
I just came across your blog and reading your beautiful words. I thought I would leave my first comment but I don't know what to say except that I have enjoyed reading. Nice blog. I will keep visiting this blog very often.
slot car
Wonderfull & complete information based on own experience! Thank you for haring this information, it is hard to find info like this in books in the Netherlands, keep shaming and you have from today a new follower! Regards Peter
Thank you so much for sharing this wealth of info.....love the Fryar Mountain circuit would you be able to pass on the table dimensions? Thank you.
Thank you so much for sharing this wealth of info.....love the Fryar Mountain circuit would you be able to pass on the table dimensions? Thank you.
Post a Comment